Thursday, March 10, 2011

Test Tile Results


Shrinkage Test Tile: First Measurement - 10 cm measurement after bisque fired - 9.8 cm

Majolica + Canary Yellow


Majolica + Vivid Orange

Decal Test Tile: White Majolica + Blue majolica

2 coats white majolica + 1 coat Blue majolica

Varda's + 2 coats Crawl

Blue Majolica: Left- 3 applications; Middle - 2 applications; Right - 1 application

Left: Canary Yellow; Right: Vivid Orange

Varda's Texture Brown thick

Canary Yellow

Crawl

thin coat of excellent black + thin coat of Varda's

Left: 2 coats canary yellow brushed on; Right: 3 coats canary yellow brushed on

Left: 2 coats canary yellow brushed on; Right: 3 coats canary yellow brushed on

Purple Crawl

Blue Majolica

Blue Majolica

Excellent Black + crawl

Sudee Yellow

Varda's texture brown + crawl

SDSU Purple Crawl

Crawl

Varda's Texture Brown

majolica + straw stain

Thin coat of majolica + yellow stain

Straw Stain

Yellow Stain

Results: I found that the Varda's Texture Brown proved to be very inconsistent and have an undesired effect. Majolica needs a few even coats. Stains show up stronger and more even with majolica under it. Excellent black +crawl had very desired results for the hand. The blue majolica looks better over white majolica. SDSU purple turns a very blueish color. Commercial glazes had very little run stayed almost exactly in place.

Final Glaze Map:

Bottom and top section of arm: 3 coats of majolica sprayed + 2 thick coats of Vivid orange sprayed

Middle Section of arm: 3 coats of majolica sprayed + 2 thick coats of Canary yellow sprayed

Hand: 2 coats of excellent black + 2 coats crawl brushed on roughly

Nails: 2 coats of majolica + 2 coats straw stain brushed on

Crown: 2 thick coats of majolica sprayed + 2 coats of yellow stain sprayed

Book end: 3 coats of majolica brushed on + 2 coats of Blue majolica brushed on; the decal was applied post firing and then refired

A Weather-Worn Mini-Armoire Reliquary by Amanda L. Jones

(What a mouthful!)

My objective in making this piece was to re-create a jewelry box I had as a young girl, to hold a flower barrette (my object of importance). It wasn't an exact replica, some details and colors were changed to get my message across. I used very basic colors: red (crimson stain), yellow (straw stain), blue (vargas purple), black (Katrina's Excellent Black), and white (white majolica). Unfortunately, a lot of my test tiles produced results I wasn't entirely pleased with, so I have no test tiles for the vargas purple.

Here are my test tiles for Katrina's Excellent Black, straw stain, sudee blue, and crimson stain.

For the flower detailing, I used white and blue majolica, yellow stain, pink stain, and black stain.


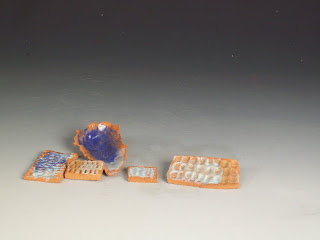
Here are my test tiles for blue majolica and sudee blue (not used in final piece).

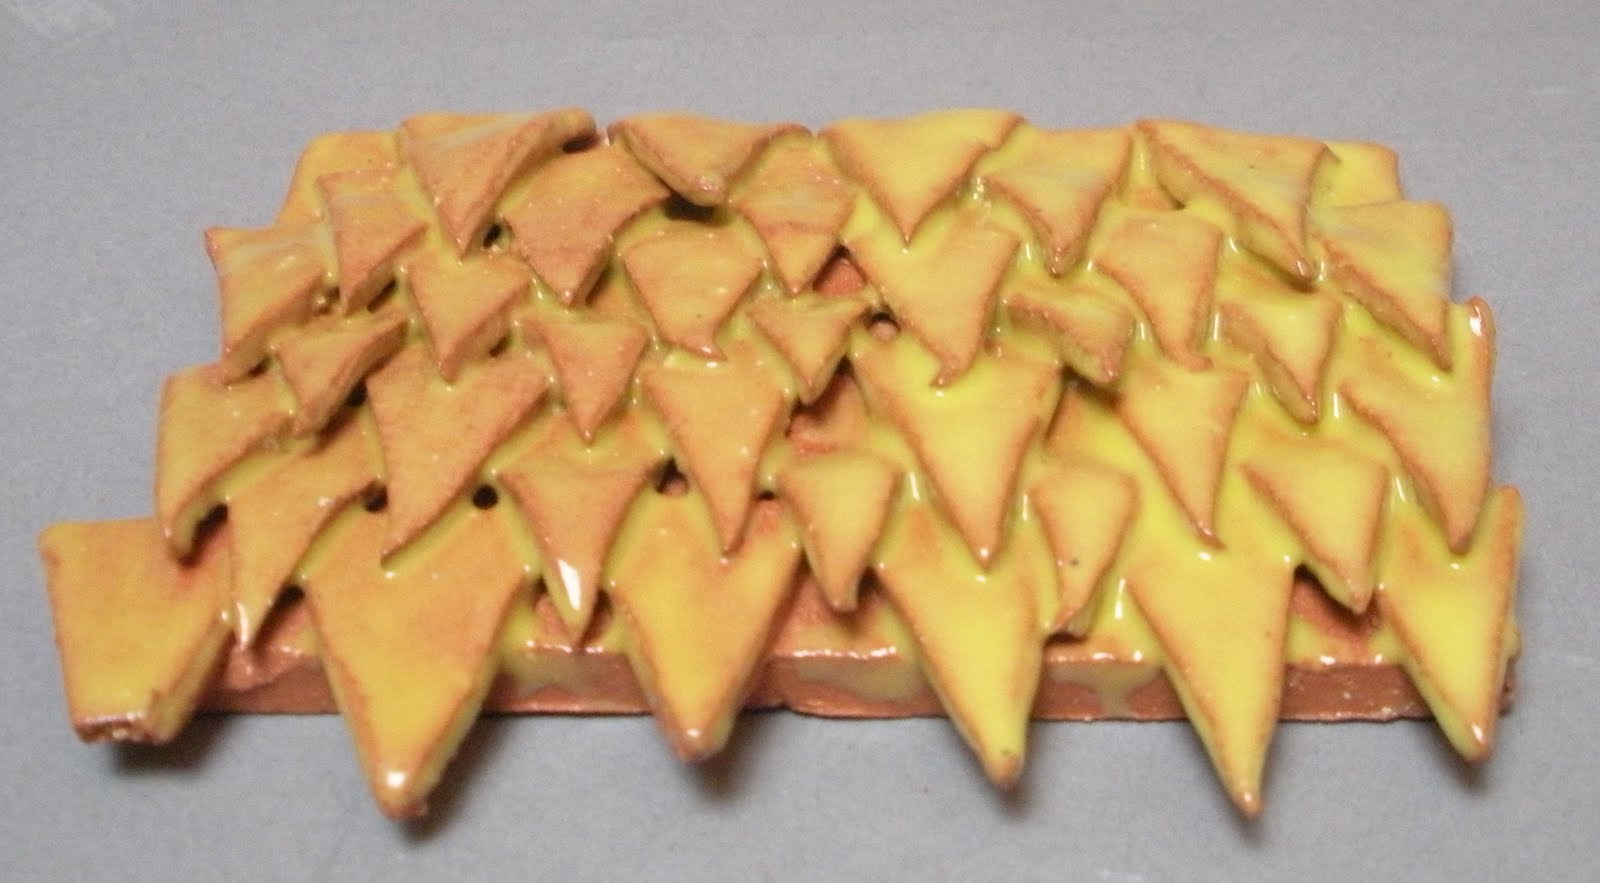
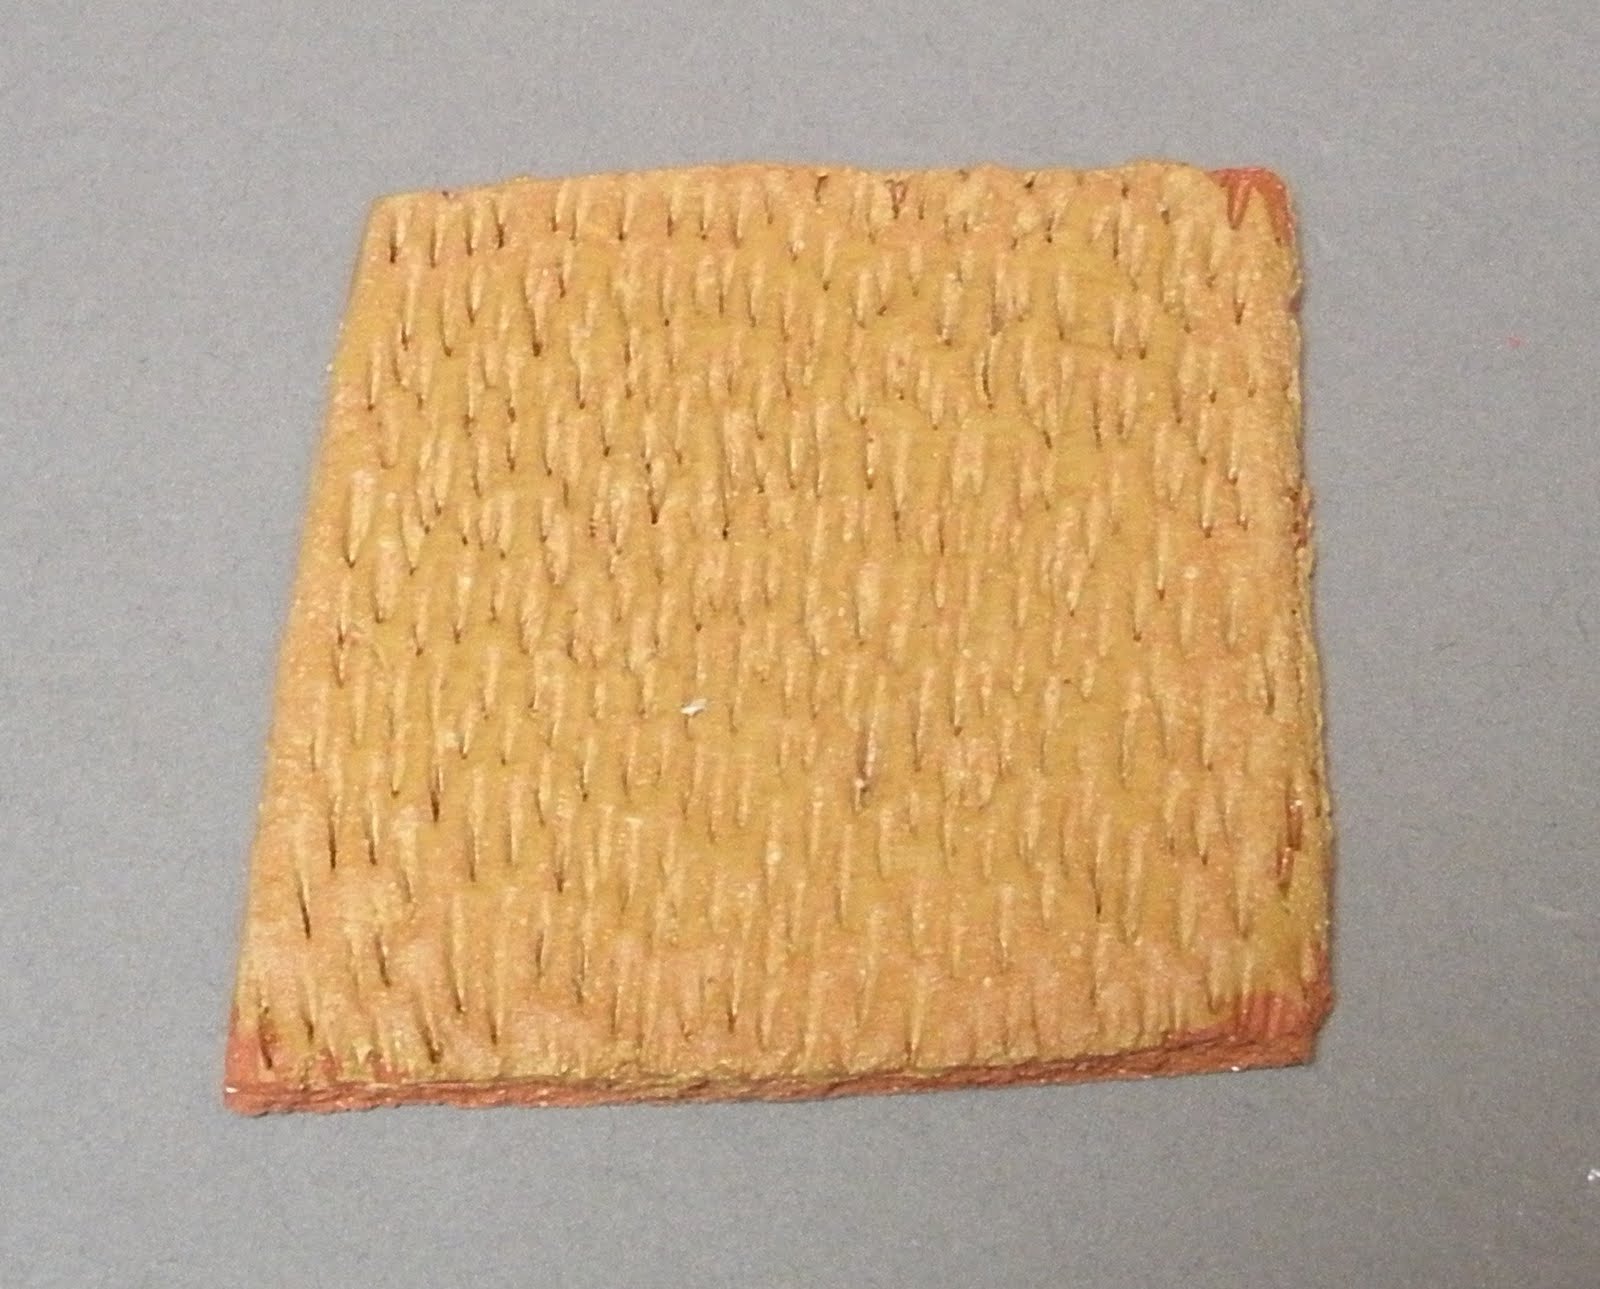
A detail I would like to bring attention to is the woodgrain texture. It's probably my favorite part about the piece, but I'm a bit biased, as I try to include this texture in a lot of my work simply because I enjoy creating it, I've worked a lot at making my marks look convincing.


This look was achieved by carving into the clay at its leather-hard stage, then after bisque-firing, coating the surface in black stain; once the stain dried, a wet sponge was applied in light strokes until most of the stain had been removed from the smooth surface and remained only in the recesses in the clay, then a thick layer of straw stain was applied on top.

As for building this piece, it was rather simple (I wish I took more pictures of the in-progress stages! This would be very helpful for future documentation). Use some MC109 clay body (available for cut-throat rate at Co-Op, available for the cheap from the LSU Ceramics Dept in the form of reclaim [I highly recommend this]).

1. The slab roller is your best friend for this piece. Get to know her well. Watch a few movies with her. Share some late night conversation. Have dinner.

2. FOR THE BODY: Roll out 6 slabs, about a quarter-inch thick. Let them achieve leather-hardness before constructing.
-one 10' x 20'
-two 5' x 10'
-two 5' x 20'
-one 5' x 4'

3. Obviously the largest one is your back panel, the small ones are your base/shelf, the teeny baby is your mini-top-shelf, and the long-n-skinnies are your side panels. Slip and score the crap out of them (There is no such thing as too much slipping/scoring, which I learned the hard way when my middle shelf slumped during glaze firing). Put them together the way you would a box; attach the side panels, then the base panel, then the middle shelf and baby shelf (the baby shelf can go anywhere your heart desires. I put mine in the top left corner of the interior). Then get to carvin' that woodgrain!


Look at that itty bitty shelf. How sweet.

4. I had made a box for the shelf and a drawer for the bottom slot, but
a. neither of them fit after that shelf slumped
b. silly me completely blanked on photographing them BECAUSE they didn't fit

5. So although I don't have pictures, I'll still tell you how to put those bad boys together, just because I like you guys, and it's pretty easy.

1) Slabs! Leather hard!
-three 5' x 9' (two bases and a lid for the box)
-four 5' x 3' (sides)
-four 3' x 9' (fronts/backs)
2) Just like with the body of the armoire, slip and score the crap out of these. Put them together like so: lie the base flat on the table, attach both side panels standing up, let them set, attach both front/back panels standing up, and let THEM set.
3) once you have two of these made, the only slab remaining is the lid for the shelf-box. Make it pretty. I added a decorative handle to the top of mine for easier removal.
4) carve in your texture!

6. So once you have all this done, it's time for the final building step. The flowers! It may be easier to use a stencil for petals than to do what I did, but I hand-cut each petal from a slab and pieced them together as so
-first layer of 2"-long petals, 5 attached at the center
-add on top a second layer of 1"-long petals, attached the same way
-and finally, a third layer of 1/2"-long petals

7. Now for bisque firing! Cone 04, don't forget. We loaded ours as a class in the Blaauw gas kiln.

8. -jeopardy theme song-

9.-repeat for a very long time-

10. Okay! They're fired! Time to glaze!

11. As I said before, I used pretty basic colors for a child-like color scheme. My first step was to coat all the woodgrain surfaces in black stain. Then I wiped away the majority of it until only stain remained in the indentions of the woodgrain texture. Then I coated those surfaces with a gratuitous layer of straw stain. It was only one layer, but it was very thick. That stuff... it's thick.

12. I painted the interior of the side panels and the top of the shelves with crimson stain, about 3 layers.

13. The top surface of the base was treated with 3 layers of vargas purple.

14. The back panel was treated with 3 layers of white majolica (I made this surface completely white to represent the turning point in my life when I took hold of my femininity and changed the way I viewed myself, a clean slate, if you will).

15. The boxes, you can have fun with the interior, whatever you think looks best. I treated my shelf box with white majolica on the inside, and my drawer with white majolica (3 layers) and vargas blue (1 layer) on the inside.

16. Flowers! Again, you can have fun with them. I used a lot of white/blue majolica, some yellow stain/pink stain for accenting. My favorite flower (which sadly chipped) was painted with 2 layers of white majolica, 2 layers of pink stain, and accented with black stain. It looked kind of real... Almost...

17. GLAZE FIRE! Cone 04! Make sure you fire your flowers seperately from everything else, so that glaze doesn't run and stick to your piece before you've even decided where you wanna put your flowers! Also, a mistake I DID make, don't fire the lid to your box ON your box... its glazes will run and it will become one with your box.

18. I recommend finding a new gameshow song, you'll be sick of the Jeopardy one by now

19. DONE! All that's left to do now is use some 2-part epoxy (I bought some of the clear stuff at Wal-Mart for like 4 bucks, made sure it was both ceramic and glass safe, worked like a charm) to attach your flowers onto your piece. Wherever you think looks best. I placed mine at different points around the piece to draw the viewer's eye in circles, seeing the piece as a whole involuntarily.

20. Photograph that bad boy.

Lookin' good.

Wednesday, March 9, 2011

Assignment: Reliquary


Overall objective:

My reliquary was to symbolically hold aspects of my academic interests. The overall form of the hand represents the humanities, specifically anthropology. I am also studying Russian which inspired the under glaze pattern and the iconographic figurines for the recesses in the tips of the fingers. The printed decals used on the base came from a book called Learning Russian through Pictures.

The base was built with hard slabs about 1/3 of an inch thick. The hand and wrist were coil built with a slab at the base of the hand to help support the structure. Once the piece got dryer, I cut out the recesses in the fingers and openings for the draws on the palm. Since the clay was already a little hard, the textures I tried to apply inside the recesses were not as visible as I was hoping for.

Application:

Most of the exterior of the piece is smooth and lacks any distinguishing textures. This is so I could apply the under glaze pencil and print-out-decals more easily. In the recesses in the fingers there is texture, but it is hard to see due to its location inside of the piece.

On the hand I used under glaze pencil to draw a Russian textile pattern I found on the Internet. I then sprayed on two light layers of Sudee Yellow. I would have done three, but I didn’t want to cover up the pencil and I was looking for a more fleshy effect which I got by letting the red clay show through the glaze. The base is covered in white majolica so that the black decals stand out and adhere to the clay. The figurines are a stain/glaze combination from a classmate's test tile which gives them an old metallic look.

Results:

Even though I wanted to have some of the red clay show through the Suede Yellow glaze, I think I should have applied it more evenly. It almost looks like a clear glossy glaze in some parts. I was also sloppy with my application of the majolica to the base; it came out uneven and there's not a clean line separating the wrist from the base.


How To Make a 1611 King James Bible Reliquary

1. Prepare clay to be rolled on the slab roller. Set slab roller to about 3/8 inch for book and pages, and about ½ inch for slide racks. Roll 2 slabs roughly 13”x21” (cover and back). 1 slab 16”x18” (pages). 1 8”x21” (spine). 1 9”x16” (slide racks)

2. Place each 13x21 slab between drywall boards to dry out. Once they are leather hard, place crinkled plastic bag on surface to imprint leather texture.

3. Press 9x16 slab on rough wooden board to imprint wood grain.

4. Use long sharp kitchen knife to make page texture. Keep knife parallel while “chopping”. Repeat until desired amount of texture is applied.

5. Let slabs harden another day.

6. Cut slabs to final size 12x20 (cover and back), 5x18, (2)5x11 (edges of pages), (4)2x16 (slide racks)

7. Measure out spacing for cutouts for slide rack and cut using razor blade, keep edge as clean as possible.

8. Use serrated rib to score grooves, then apply slip( clay with more water, yogurt consistency) to groves and press slabs together to join.

9. Use this method to make a book shape out of the 4 slabs. Lastly add the spine. Bend the spine a few time to create realistic cracks.

10. Add small (pencil diameter) coils to all joints inside for strength.

11. Add 5 1/2”x 4” pieces to create rasied bars on spine, bevel edges at 45 degrees.

12. Refine edges and press slightly to mimic a real book.

13. Join pieces together to create 2 slide racks. Use pen cap to create faux nail heads.

14. Print out desired text and graphics on regular paper. Get paper wet and lay on area to create template. Outline in ballpoint pen, remove paper then carve deeper with small loop tool.

15. For cover, trace template, then remove some clay with loop tool, refine edge with wood sculpting tool, create the effect of a layer by refining edge further.

16. Bisque fire.

17. Apply diluted black stain with hake brush to entire piece, use a dry sponge to wipe excess stain off, leaving stain in the cracks. Repeat until desired effect is achieved, About 3 times.

18. Apply iron wash in same manner, only 1 coat.

19. Brush on undiluted black stain to pages and lettering.

20. For slide racks, apply diluted black stain and rub off, apply 1 coat rutile wash, and spray on 1 coat clear glaze.

21. Add iron wash drops to fill in nail heads.

22. Glaze Fire.

23. Brush off excess dust.

24. Apply gold leaf adhesive size to pages, working one side at a time.

25. Press on gold leaf, rub with pad of thumb and fingers, lift tissue off carefully.

26. Use Hake brush to burnish loose areas into surface.

27. Apply adhesive to lettering, then add gold leaf.

Javelin Cleat Reliquary

Jenna Baker


This cleat was built using the slab building technique, made out of Terracotta clay, and, after a bisque firing, had numerous glazes applied to it's surface. The cleat was meant to resemble a pinata with grass underneath it. It is approximately 12 inches tall, 14 inches long, and 5 inches in width. The inside of the cleat was made to hold my glaze test-tiles.

I began building my cleat by creating a bottom heavy base(under the grass) to make the structure stable. As I used slabs of clay to build up to
the top of the cleat, i gradually made the slabs thinner. I tried to make the cleat appear to have the folds of the actual cleat. The details, Grass and pinata papers, were made to appear weightless and airy by curving them effortlessly. I also tried to achieve visual tension by not showing support under the heel of the shoe.


I used this test-tile result for the body of my shoe. It is 3 coats of Mijollica glaze.


On the heel and accents of the cleat, i used this test-tile. It is 3 coa
ts of crimson stain.


The zipper pull is a simple 2 coats black stain.


PICTURE IS COMING SOON


For my grass i used this. The super messy, handle with care, kiln shelf ruiner, is a mixture that goes a little something like this: 1 copper green glaze, 2 Chartreuse, and 2 coats Alternative clear glaze. (It is a runner, watch out!!)


Dylan Purvis
3-9-11

Overall Objective:
The significant object to me I was trying to signify was the signature of one of my favorite musicians, Jonny Craig. His voice sounds very natural and it is generally the music I go to when I want to calm down and just be mellow.

I did not use the test tiles I made for the piece originally to base any of my glazings. Instead, I used some glaze combinations that I got from other classmates.

For the top of the microphone bulb, I used white slip-trailing to create the netting effect like a microphone has. For the glaze I used a combination of 1 thick layer of Copper Green stain, 2 layers of Chartreuse Stain, and 2 layers of clear glaze. It created a metallic, shiny silver effect, like the metal of a microphone.

For the neck of the microphone, I used 3 layers of black slip before the bisque firing, and after, I used 3 layers of Katrina's Excellent Black. It didn't show very much because of the dripping of the glaze from the microphone bulb.

For the trunk/base area I used 3 coats of Nutmeg glaze, which in some spots got covered with the glaze from the bulb.

Overall Results:
I intended for the silver to be runny, but not as runny as it ended up being. It was painted on just the bulb, and was only supposed to run down the neck, not the whole piece, but all in all I think my piece was successful, and ended up, for the most part, like I wanted it to be.
The silvery glaze combo dripped down my piece and ruined my drawer-hole, but besides that there were no real mess ups.
Nathan Drake
3/9/2011

Overall Objective: The Holy Bible has a strong personal significance to me. In this project I took the challenge to make a hyper-realistic sculpture of a 400 year old leather book. On the inside, the test tiles acted as scientific glass slides in a slide rack. There is a unique contradiction between science and religion. I made the decision to represent both as they both greatly affect my life.

I tested several different techniques to find the best surface treatment for the book. I used a plastic bag in the leather hard stage to give the natural leather grain look. I stressed different areas of the clay to give the appearance of extremely worn and used leather, especially at the crease. I created the wood grain slide racks by pressing the clay against a wood board with a raised grain. The pages were created using a long sharp kitchen knife.
My main goal was to create a realistic replica of a old leather book.


Application:
Leather: 1 part Andrew martin Black Stain 3 parts water. Brushed on with hake brush, then rubbed with dry sponge. Repeat as necessary to give depth and age to leather.
Iron Wash brushed on liberally then rubbed with dry sponge.

Pages: Undiluted Andrew Martin Black Stain base coat, apply Gold leafing after glaze firing. Burnish gold leaf with hake brush to break and show black in cracks.

Wood: 1 coat AM Black Stain wash brushed and rubbed, 1 coat Rutile wash brushed, 1 coat Shop clear glaze sprayed on. Nail heads are a drop of iron wash.

Results:
I was very happy with the results. The iron wash and black stain wash convey old stained leather, accenting the creases and grain. The pages turned out exactly how I pictured them in my head. The wood slide racks gave interesting results, they were on different shelves so might have been fired slightly different. Overall results very good.